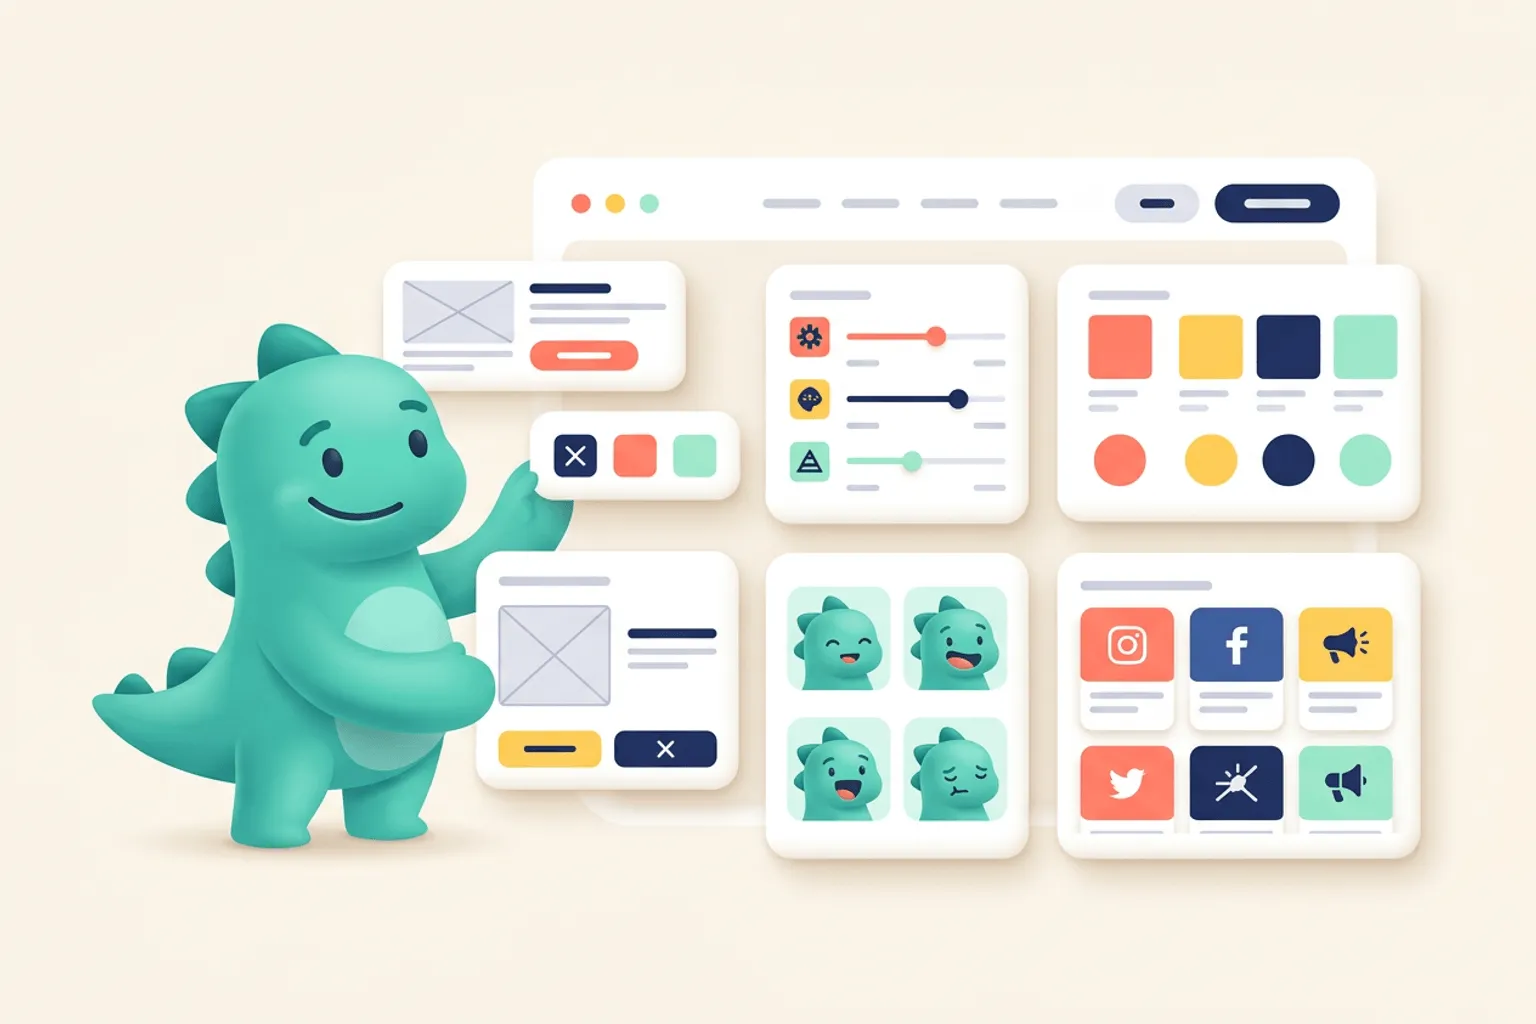
AI Mascot Generator Workflow for Brand Characters
A full guide to using Nano Banana Pro and Seedance 2.0 to create consistent brand character poses, short animations, and production-ready mascot assets.
Quick Answer
An AI mascot generator works best when you treat it like a production pipeline, not a one-prompt novelty. Use an image model such as Nano Banana Pro to design the character, build a reliable pose library, and create clean visual references. Then use a video model such as Seedance 2.0 to turn selected poses into short, controlled animations.
Core idea: Start with static brand character poses before you animate anything. Animation is much easier when the character already has stable proportions, colors, expressions, and readable poses.
- Use Nano Banana Pro for the first character direction, pose variations, expression sheets, prop tests, and style corrections.
- Use Seedance 2.0 for motion studies, short loops, onboarding clips, social posts, and product microinteractions.
- Keep every prompt tied to a written mascot brief so the character does not drift from one generation to the next.
- Review output in real product contexts, not only on a white background.
This guide walks through the full workflow: the brand brief, initial pose generation, consistency control, animation prompts, QA, exports, and the point where a focused mascot tool saves more time than a generic AI stack.
What an AI mascot generator actually needs from you
Most teams start by asking for a “cute mascot” or “friendly brand character.” That is understandable, but it is not enough direction for production. AI image models can produce polished visuals from vague prompts, but polished is not the same as usable. A product mascot has to survive repeated use across onboarding, empty states, announcements, help content, pricing pages, ads, and social clips.
That means the workflow needs four inputs before you generate:
- A brand role: what the character does for the user.
- A visual system: shape language, palette, rendering style, and file expectations.
- A pose plan: the situations the character must support.
- A motion plan: the types of animation the brand can use without feeling noisy.
Think of the mascot as a tiny cast member in your product. It should not change personality every time you need a new asset. The better your brief, the less you have to fight the model later.
Start with a mascot brief
Before opening Nano Banana Pro, write a compact mascot brief. This is not a long brand book. It is a practical reference you can paste into prompts and use for review.
Define the character role
Start with the job the character performs. A mascot for onboarding has a different role from a mascot for technical support. A mascot for a finance app needs different emotional boundaries than one for a creative consumer app.
Useful role statements look like this:
The mascot is a calm product guide for a B2B design tool. It helps users feel oriented, capable, and unblocked without being loud or childish.The mascot is an energetic launch companion for an indie app. It appears in social announcements, release notes, and success states, with expressive poses and quick celebratory motion.The mascot is a support assistant for a developer tool. It should feel technically fluent, patient, and concise. It should never look like a toy or a generic chatbot avatar.The role statement matters because it gives you a filter. If the model returns something charming but wrong for the product, you can reject it quickly.
Define the visual constraints
Next, define the visual boundaries. These constraints keep the mascot compatible with your app and brand system.
Include:
- Shape language: geometric, rounded, flat, dimensional, hand-drawn, sticker-like, icon-adjacent.
- Palette: primary brand colors, accent colors, and colors to avoid.
- Detail level: simple enough for small UI placement, detailed enough for marketing, or separate versions for each.
- Background: transparent, isolated, no scene unless needed.
- Output intent: SVG-friendly, clean vector shapes, no noisy texture, no complex hairline detail.
- Mood: calm, clever, premium, technical, playful, editorial, supportive.
For mascot systems, “SVG-friendly” is an important phrase. Even if the image model outputs raster art, you want the composition to be easy to trace, clean up, or rebuild as vector. Ask for simple contours, strong silhouettes, limited shading, and readable limbs.
Define the pose plan
Do not generate random poses. Generate a pose library around product moments.
A useful first pose matrix includes:
| Moment | Pose | Where it appears |
|---|---|---|
| Welcome | waving or presenting | onboarding, signup, first run |
| Thinking | holding a note, inspecting, looking curious | loading, search, planning |
| Success | celebrating, thumbs up, holding trophy | completion, payment success, deploy success |
| Error | confused, holding sign, pointing to retry | 404, empty results, failed state |
| Help | pointing, explaining, holding tool | docs, tooltips, support |
| Announcement | megaphone, banner, confetti | launch posts, release notes |
| Rest | seated, idle, neutral | dashboard, footer, help center |
The pose matrix prevents the classic AI problem: generating 30 fun images and realizing none of them solve the actual UI need.
Use Nano Banana Pro for the first character direction
Nano Banana Pro is useful for this stage because it is built for image generation and editing with stronger control over complex visual instructions. Google also positions Gemini 3 Pro Image as useful for professional image editing and controlled creative work in the Gemini API documentation. For mascot work, that translates into better results when the prompt includes brand constraints, layout intent, text avoidance, references, and precise edits.
Start with concept exploration, but keep it narrow. You are looking for one character direction that can become a system.
Prompt for three concepts, not twenty
Too many concepts can slow the process down. Ask for three clear directions inside the same brand brief. This gives you options without losing focus.
Create three distinct mascot concepts for a SaaS app called [product name].

Brand role:
The mascot is a calm product guide that helps users feel oriented, capable, and unblocked.

Audience:
Startup founders, designers, and product teams.

Visual style:
SVG-friendly, clean vector illustration, rounded geometry, limited shading, transparent background, no text, no complex texture.

Brand palette:
[primary color], [secondary color], [accent color]. Avoid neon colors and overly childish styling.

Output:
Show each concept as a full-body character in a neutral standing pose, with clear silhouette and simple proportions.
Review the results for system potential, not just immediate charm. The best mascot direction is usually the one that can be posed, simplified, animated, and reused. Avoid characters with tiny accessories, complex clothing, detailed hands, or fragile facial features unless those details are essential to the brand.
Pick a base and lock the identity
Once you choose a direction, create an identity lock. This is a written description of the character that you reuse in every prompt.
Character identity lock:
A compact, rounded brand mascot with a friendly upright posture, oversized expressive eyes, simple mitten-like hands, short legs, and a small accent scarf in the brand's lime color. The character uses clean vector shapes, a limited blue, white, charcoal, and lime palette, subtle shadow only, transparent background, and no text.
The identity lock is not glamorous, but it is powerful. It tells the model what must remain consistent even when the pose changes.
Generate a neutral pose sheet
Before emotional or action poses, generate neutral views. This gives you a reference foundation.
Using this character identity lock, create a neutral pose sheet for the same mascot.

Keep the same proportions, colors, face, and design details across all views.

Views:
1. Front-facing standing pose.
2. Three-quarter view facing right.
3. Three-quarter view facing left.
4. Seated neutral pose.
5. Simple head-and-shoulders avatar crop.

Style:
Clean SVG-friendly vector illustration, transparent background, consistent line weight, no text, no scene, no extra characters.
Check whether the mascot still looks like the same character across views. If the model changes the face, colors, body shape, or accessories too much, correct that before moving forward.
Build the first pose library
After the neutral pose sheet, move into functional poses. The aim is not to create every possible asset. The aim is to create a small, useful library that proves the character can survive common product and marketing moments.
Prompt one pose at a time
Generating many poses in one image can be useful for ideation, but production usually benefits from one pose per output. One pose per output gives the model more room to preserve proportions and makes review easier.
Use this structure:
Create one new pose of the same mascot from the character identity lock.

Pose:
The mascot is welcoming a new user, standing in a three-quarter view, one hand waving and the other hand presenting an empty product screen area.

Constraints:
Same face, same body proportions, same colors, same accent scarf, same clean vector style, transparent background, no text, no UI details, no extra characters.

Composition:
Full-body mascot, centered, with enough empty space around the body for cropping.
Then repeat for each product moment.
Create a minimum viable pose set
A practical first library contains 8 to 12 poses:
- Neutral standing.
- Waving welcome.
- Pointing or presenting.
- Thinking or inspecting.
- Celebrating success.
- Light error or confusion.
- Holding a document, card, or checklist.
- Sitting or resting.
- Announcement pose.
- Support or explanation pose.
This is enough for onboarding, empty states, launch content, support docs, and social snippets. You can always expand later.
Is this too complicated? svgapp does it for you.
Skip the prompt juggling and generate consistent SVG mascot poses for your product in one focused workflow.
Create Your MascotKeep the character consistent across generations
Consistency is the main reason AI mascot workflows become frustrating. The first image looks good. The second image changes the face. The third changes the color palette. The fourth gives the character a new body type. The fifth looks great, but only as a raster illustration with a busy background.
You can reduce that drift with a few habits.
Reuse references deliberately
When the tool allows image references, use the best neutral pose and one successful action pose as references. Do not feed the model a messy folder of mixed outputs. References should be clean examples of what you want to preserve.
Use reference language like:
Use the attached mascot image as the identity reference. Preserve the same character design, face, proportions, colors, and overall vector style. Only change the pose and gesture.If a specific detail matters, name it. Models do not always infer which details are identity and which are decoration.
The lime scarf, rounded rectangular head shape, charcoal outline, and simple mitten hands are part of the mascot identity. Keep them unchanged.Use negative constraints
Negative constraints help when the model keeps adding unwanted detail.
Do not add text, speech bubbles, background scenery, extra objects, realistic fur, detailed fingers, complex clothing, gradients, heavy shadows, or additional characters.For SVG-friendly mascot work, negative constraints are especially helpful. They keep the output clean enough to use in UI.
Version your prompts
Save the prompt that created each approved pose. Name the model, date, reference images, and edit notes. This sounds fussy until you need to recreate the style two months later.
A simple log is enough:
| Asset | Model | Prompt version | Reference | Notes |
|---|---|---|---|---|
| welcome-wave-v1 | Nano Banana Pro | mascot-pose-v3 | neutral-front.png | Good proportions, scarf too large |
| success-confetti-v2 | Nano Banana Pro | mascot-pose-v4 | neutral-front.png, welcome-wave.png | Approved |
| support-pointing-v1 | Nano Banana Pro | mascot-pose-v4 | neutral-front.png | Needs simpler hand |
This log becomes your mini art direction system.
Edit and correct poses with Nano Banana Pro
Do not expect the first generation to be final. The real value comes from targeted edits.
Fix one thing per edit
If you ask for five corrections at once, the model may improve one area and break another. Keep edits narrow:
Keep the mascot exactly the same, but simplify the hand shape. Use rounded mitten-like hands with no visible fingers. Do not change the face, colors, body proportions, pose, or background.Keep the same mascot and pose, but remove the background elements and export on a transparent background. Keep clean vector-style edges.Keep the same mascot and composition, but make the expression more calmly helpful instead of excited. Do not change the body, colors, props, or style.Targeted editing is also how you make the pose more animation-ready. Simplify hands, separate props from the body, make silhouettes clearer, and remove detail that will shimmer or deform in video.
Create animation reference frames
Before using Seedance 2.0, generate static keyframes. A keyframe is a still image that represents the start, middle, or end of an action.
For a wave, you might create:
- Frame A: arm down, neutral smile.
- Frame B: arm raised, smile slightly brighter.
- Frame C: arm raised further or tilted, small body lean.
For a celebration:
- Frame A: neutral anticipation.
- Frame B: arms up.
- Frame C: final celebratory pose.
For an error state:
- Frame A: neutral.
- Frame B: noticing the problem.
- Frame C: gentle shrug or pointing to retry.
You do not always need full frame-by-frame animation, but keyframes help the video model understand the motion without reinventing the character.
Prepare assets for Seedance 2.0
Seedance 2.0 is a multimodal video model, which makes it useful when you want to guide video generation with a mix of text and visual references. For mascot animation, you want to provide the clearest possible reference stills and a motion prompt that describes only the movement you need.
The most common mistake is asking for a complete cinematic scene when you only need a tiny product animation. Keep the request small.
Decide what the animation is for
Before prompting Seedance, choose the destination:
| Destination | Best animation type | Typical duration |
|---|---|---|
| Product UI | subtle loop, blink, point, bounce | 1 to 3 seconds |
| Onboarding | short explanatory gesture | 3 to 6 seconds |
| Launch video | expressive character moment | 4 to 10 seconds |
| Social post | readable loop with clear action | 5 to 12 seconds |
| Help content | calm pointing or demonstration | 2 to 6 seconds |
The destination determines energy level. A mascot bouncing forever inside a dashboard can become distracting. The same motion in a launch post might be perfect.
Make a motion brief
Write motion rules before generating video:
Motion style:
Subtle, friendly, product-safe. The mascot moves like a clean vector character, not a realistic 3D figure. Motion should be smooth, small, and loopable.

Allowed movement:
Blink, slight body bounce, one hand wave, small head tilt.

Not allowed:
Camera movement, scene change, extra characters, changing outfit, changing colors, changing face, realistic texture, busy background.
This keeps the video model from turning a UI asset into a short film.
Animate a mascot pose with Seedance 2.0
Start with one approved pose, then generate a short loop. Do not begin with your most complex scene. Use a wave, blink, or gentle bounce as the first test.
Seedance prompt for a simple wave
Create a short loopable animation from the provided mascot image.

Character:
Preserve the exact same mascot identity, proportions, colors, face, scarf, and clean vector illustration style.

Motion:
The mascot performs a small friendly wave with one hand, blinks once, and has a subtle body bounce. The movement should be smooth and restrained.

Composition:
Transparent or plain solid background, centered full-body character, no camera movement, no text, no new props, no extra characters.

Timing:
2 seconds, loopable, product UI safe, calm and friendly.
Review the result for identity drift first. If the mascot changes too much, the motion is not worth keeping.
Seedance prompt for a success animation
Create a short success animation from the provided mascot image and reference pose.

Character:
Keep the exact same mascot design, proportions, colors, face, and vector style.

Motion:
The mascot raises both arms in a small celebration. A few simple brand-colored confetti shapes appear briefly and fade out. The motion should feel polished, lightweight, and suitable for a SaaS success state.

Composition:
Mascot remains centered. No camera movement. No background scene. No text. No extra characters. Keep the character readable at small sizes.

Timing:
3 seconds, clean beginning and ending, suitable for web onboarding.
Seedance prompt for an onboarding explanation
Animate the provided mascot as a helpful onboarding guide.

Character:
Preserve the same mascot identity, colors, face, proportions, and clean vector style.

Motion:
The mascot turns slightly toward an empty area on the right and points gently, as if presenting a product feature. Add a small head nod and a calm blink. Keep the movement subtle and professional.

Composition:
Full-body character on transparent or plain background. Leave empty space on the right for UI copy. No text, no interface, no extra props, no camera movement.

Timing:
4 seconds, smooth and restrained, suitable for an onboarding screen.
Is this too complicated? svgapp does it for you.
Use svgapp to create the consistent mascot poses first, then bring only the best moments into animation.
Create Your MascotCreate animation keyframes from Nano Banana Pro poses
For more controlled animation, generate keyframes in Nano Banana Pro before moving into Seedance 2.0. This gives the video model a stronger visual path.
Wave keyframe prompt
Create three keyframe images for the same mascot performing a friendly wave.

Use the same character identity, proportions, colors, face, scarf, and clean SVG-friendly vector style in all frames.

Frame 1:
Mascot standing neutral, one hand low.

Frame 2:
Mascot hand raised halfway, slight head tilt, friendly smile.

Frame 3:
Mascot hand raised at the top of the wave, tiny body lean, same expression.

Constraints:
Transparent background, no text, no extra props, no extra characters, consistent camera angle, consistent scale.
Then use those frames as references in Seedance:
Animate the mascot from keyframe 1 to keyframe 3 and back into a smooth loop. Preserve character identity exactly. Keep the motion small, clean, and vector-like. No camera movement, no new objects, no background scene, no text. 2 seconds, loopable.Celebration keyframe prompt
Create three keyframe images for the same mascot celebrating a completed task.

Frame 1:
Mascot looks pleased with arms relaxed.

Frame 2:
Mascot lifts arms and leans upward slightly.

Frame 3:
Mascot holds a small success pose with a few simple brand-colored confetti shapes.

Keep the same character identity, proportions, palette, face, and vector style. Transparent background. No text. No background scene.
Seedance can then interpolate the motion with a clearer sense of beginning, middle, and end.
Keep animation brand-safe
Mascot animation should support the user, not compete with the task. The same character can have different motion intensity across surfaces.
Product UI motion
Use product UI motion for:
- Empty states.
- Success states.
- Onboarding steps.
- Loading moments.
- Help panels.
Keep it subtle. The motion should not delay interaction, distract from forms, or loop aggressively near important controls. A blink, nod, point, or small bounce is often enough.
Marketing motion
Marketing can carry more personality. For landing pages, social posts, and launch videos, the mascot can gesture more broadly, react to props, and use more expressive timing.
Still, avoid turning every animation into a different visual universe. Keep the same proportions, style, color palette, and behavior rules.
Social motion
For social clips, readability matters more than detail. Viewers see the video quickly, often on a small screen. Strong silhouettes, simple motion, and clean framing usually outperform intricate animation.
Use:
- One clear action.
- Centered composition.
- Strong contrast.
- Minimal text, if any.
- A loop that reads without sound.
If you need captions or product messaging, add them in your video editor rather than asking the model to render final text inside the character animation.
Export and production cleanup
AI output still needs production review. The goal is not to publish every generation untouched. The goal is to create a strong source asset quickly, then clean it for the channel.
Static pose exports
For static poses, prepare:
- SVG where possible.
- PNG with transparent background.
- WebP for web performance when transparency and browser support fit your needs.
- Consistent naming, such as
mascot-welcome-wave.svgandmascot-success-celebration.png.
Check each pose at the sizes you will actually use. A pose that looks good at 1200 px may fail at 160 px because the expression disappears or the prop becomes unreadable.
Animation exports
For animation, choose format by use case:
| Use case | Practical format |
|---|---|
| App UI loop | Lottie, animated SVG, WebM, or lightweight MP4 depending on your stack |
| Landing page | MP4/WebM with poster image |
| Social | MP4 |
| Static fallback or GIF only when needed | |
| Docs/help center | Small MP4/WebM or static pose |
Always provide a static fallback for important product states. Users with reduced motion settings, low bandwidth, or email clients may not see the animation.
Accessibility checks
Mascots should never be the only way important information is communicated. If an error state uses a confused mascot, the text still needs to explain the error. If a success animation plays, the interface still needs a clear success message.
Also consider reduced motion. Product animations should respect user preferences and avoid essential meaning that only appears through movement.
QA checklist for AI-generated mascot systems
Use this checklist before publishing the mascot assets.
Identity consistency
- Does every pose look like the same character?
- Are the face, colors, proportions, and signature details stable?
- Does the character still match the brand role?
- Are rejected details staying out of new generations?
UI readiness
- Does the pose work on light and dark backgrounds?
- Is the silhouette readable at small sizes?
- Are the edges clean enough for production?
- Does the mascot fit into real screens without crowding content?
- Is there enough empty space around the asset for responsive layouts?
Animation quality
- Does the animation preserve the character identity?
- Is the motion restrained enough for its destination?
- Does the loop begin and end cleanly?
- Are hands, face, and props stable during movement?
- Is there a static fallback?
Brand control
- Are prompts and references saved?
- Are approved poses named and versioned?
- Are source files stored in a shared location?
- Are usage rules documented for product, marketing, and social?
Common mistakes
Starting with animation too early
If the mascot is not consistent as a still image, animation will magnify the problem. First get the character identity and pose library right. Then animate the best poses.
Letting each tool redesign the character
Nano Banana Pro and Seedance 2.0 have different strengths. Use Nano Banana Pro to define and correct the visual identity. Use Seedance 2.0 to move that identity. Do not let the video step become a redesign step.
Asking for a whole campaign in one prompt
Large prompts that request a mascot, a scene, a product UI, text, props, and animation all at once are difficult to control. Split the workflow into concept, pose, edit, keyframe, animation, and export.
Ignoring file format until the end
If you need SVG-style assets, ask for SVG-friendly visuals from the beginning. Clean contours, limited palettes, and simple shapes are easier to convert and maintain than painterly images.
Using motion everywhere
Mascot animation works best when it has a job. Use it to celebrate, orient, reassure, or explain. If the motion does not support the user moment, a static pose is often better.
A complete example workflow
Here is a practical end-to-end sequence for a SaaS team creating a mascot for onboarding and launch content.
Step 1: Write the brief
The mascot is a helpful product guide for a collaborative design app. It should feel calm, clever, and optimistic. It appears in onboarding, empty states, docs, and launch posts. The visual style should be SVG-friendly, rounded, clean, and modern, with a limited palette based on navy, white, mint, and coral. The character should not feel childish, chaotic, or overly detailed.Step 2: Generate three base concepts in Nano Banana Pro
Ask for three neutral full-body concepts. Pick one based on reuse potential.
Step 3: Create the identity lock
Write the approved character details into a reusable paragraph. Include proportions, colors, face, accessories, and style.
Step 4: Generate neutral views
Create front, three-quarter, seated, and avatar crops. Correct any identity drift.
Step 5: Generate eight product poses
Create welcome, success, support, error, thinking, announcement, resting, and pointing poses. Save the prompt for each approved asset.
Step 6: Create animation keyframes
For the three highest-value animations, create keyframes:
- Welcome wave.
- Success celebration.
- Onboarding point.
Step 7: Animate in Seedance 2.0
Use the approved pose or keyframes as references. Prompt for short, controlled motion with no redesign, no new scene, and no camera movement unless the destination requires it.
Step 8: Clean up and export
Prepare static SVG/PNG assets, short video exports, poster frames, and static fallbacks. Test the assets in actual UI and marketing templates.
Copy these prompts
Use these as starting points, then add your brand details and references.
Nano Banana Pro mascot concept prompt
Create three mascot concepts for [product name], a [product category] for [audience].

Brand role:
[Describe what the mascot helps users feel or do.]

Personality:
[Calm, clever, playful, premium, technical, supportive, etc.]

Visual style:
SVG-friendly clean vector illustration, rounded shapes, limited palette, transparent background, simple readable silhouette, no text.

Brand palette:
[List colors.]

Avoid:
Busy backgrounds, realistic texture, complex clothing, detailed fingers, extra characters, text, logos, or scene elements.

Output:
Three full-body neutral mascot concepts with consistent scale and clear silhouettes.
Nano Banana Pro pose prompt
Create one new pose of the same mascot using the attached reference image.

Pose:
[Describe the exact action and emotional state.]

Identity:
Preserve the same mascot design, face, proportions, colors, accessories, and clean vector style.

Composition:
Full-body character, transparent background, centered, enough padding for cropping.

Avoid:
Text, background scene, extra props unless specified, extra characters, realistic texture, complex gradients, or style changes.
Nano Banana Pro correction prompt
Keep the same mascot and pose. Only change the following detail:
[Specific correction.]

Do not change the face, colors, body proportions, accessory, composition, background, or overall vector style.
Seedance 2.0 animation prompt
Animate the provided mascot image into a short product-safe loop.

Character:
Preserve the exact same mascot identity, proportions, colors, face, accessory, and clean vector illustration style.

Motion:
[Describe one simple action: wave, blink, point, bounce, celebrate, nod.]

Style:
Smooth, restrained, friendly, loopable, suitable for a web product interface.

Composition:
Centered full-body character, transparent or plain background, no camera movement, no text, no new props, no extra characters.

Timing:
[2 to 4 seconds], clean beginning and ending.
When to use svgapp instead of a DIY workflow
A DIY workflow with Nano Banana Pro and Seedance 2.0 can be powerful. It is also a lot to manage. You have to write the brief, preserve references, correct drift, generate poses, prepare animation frames, test exports, and keep everything organized.
That makes sense when you need custom experimentation or a one-off campaign. It becomes costly when your actual need is a consistent mascot library for an app, SaaS product, landing page, or launch system.
svgapp is built for the focused part of the problem: creating reusable mascot assets and consistent SVG-ready poses without stitching together a long chain of generic tools. You can still use video tools later, but the static character foundation is cleaner from the start.
Final workflow summary
Use this sequence:
- Write a mascot brief.
- Generate a small number of base concepts in Nano Banana Pro.
- Pick one character and create an identity lock.
- Generate neutral views and correct drift.
- Build a pose library around real product moments.
- Create keyframes for the few poses that need motion.
- Animate short, controlled loops in Seedance 2.0.
- Export static and animated assets with fallbacks.
- Test everything in real UI and marketing layouts.
- Save prompts, references, and approved assets so the mascot system can grow.
The best AI mascot generator workflow is not the one that creates the most images. It is the one that gives your team a character you can actually reuse. Start static, stay consistent, animate only what matters, and keep the mascot tied to the product moments where it helps users most.