How to Create a Mascot for Your App
A step-by-step workflow for creating an app mascot, from strategy and prompts to SVG export and product placement.
Quick Answer
This guide is for founders and designers creating their first app mascot. The search intent behind how to create a mascot is usually practical: teams want to know what to make, where to use it, and how to keep the mascot consistent once it leaves the first hero section.
Core idea: The best app mascots come from a repeatable workflow: define the role, generate the base character, refine style, then create a pose library.
- Define what the mascot should help users understand or feel.
- Generate the base character before making dozens of poses.
- Export in SVG-friendly formats and test the mascot inside real UI screens.
Step 1: write the mascot brief
A mascot brief should be short enough to use but specific enough to guide output. Include the product category, audience, brand adjectives, visual style, colors, and the job of the character. The brief prevents the process from becoming a gallery of unrelated cute ideas.
For example: a friendly SVG panda for a developer tool, calm and helpful, minimal geometry, green accent color, useful in onboarding and empty states. That brief gives the AI and the human reviewer a clear target.
If you want to learn more about how to create a mascot, read AI Mascot Generator Workflow for Brand Characters next. Transparent SVG Mascots: File Formats, Exports, and Clean Product Placement is also useful when you are mapping the same mascot system across product and marketing.
Step 2: create the base character
Start with one full-body mascot. Refine silhouette, palette, face, and proportions before generating variations. If the base character is weak, every pose will multiply that weakness. Look at the mascot at small size, on dark and light backgrounds, and next to your product UI.
svgapp is useful here because you can iterate toward a vector-friendly character rather than a painterly image that becomes hard to reuse.
If you want to learn more about applying this idea in a real product workflow, Where to Place a Mascot in Your App is a practical next step.
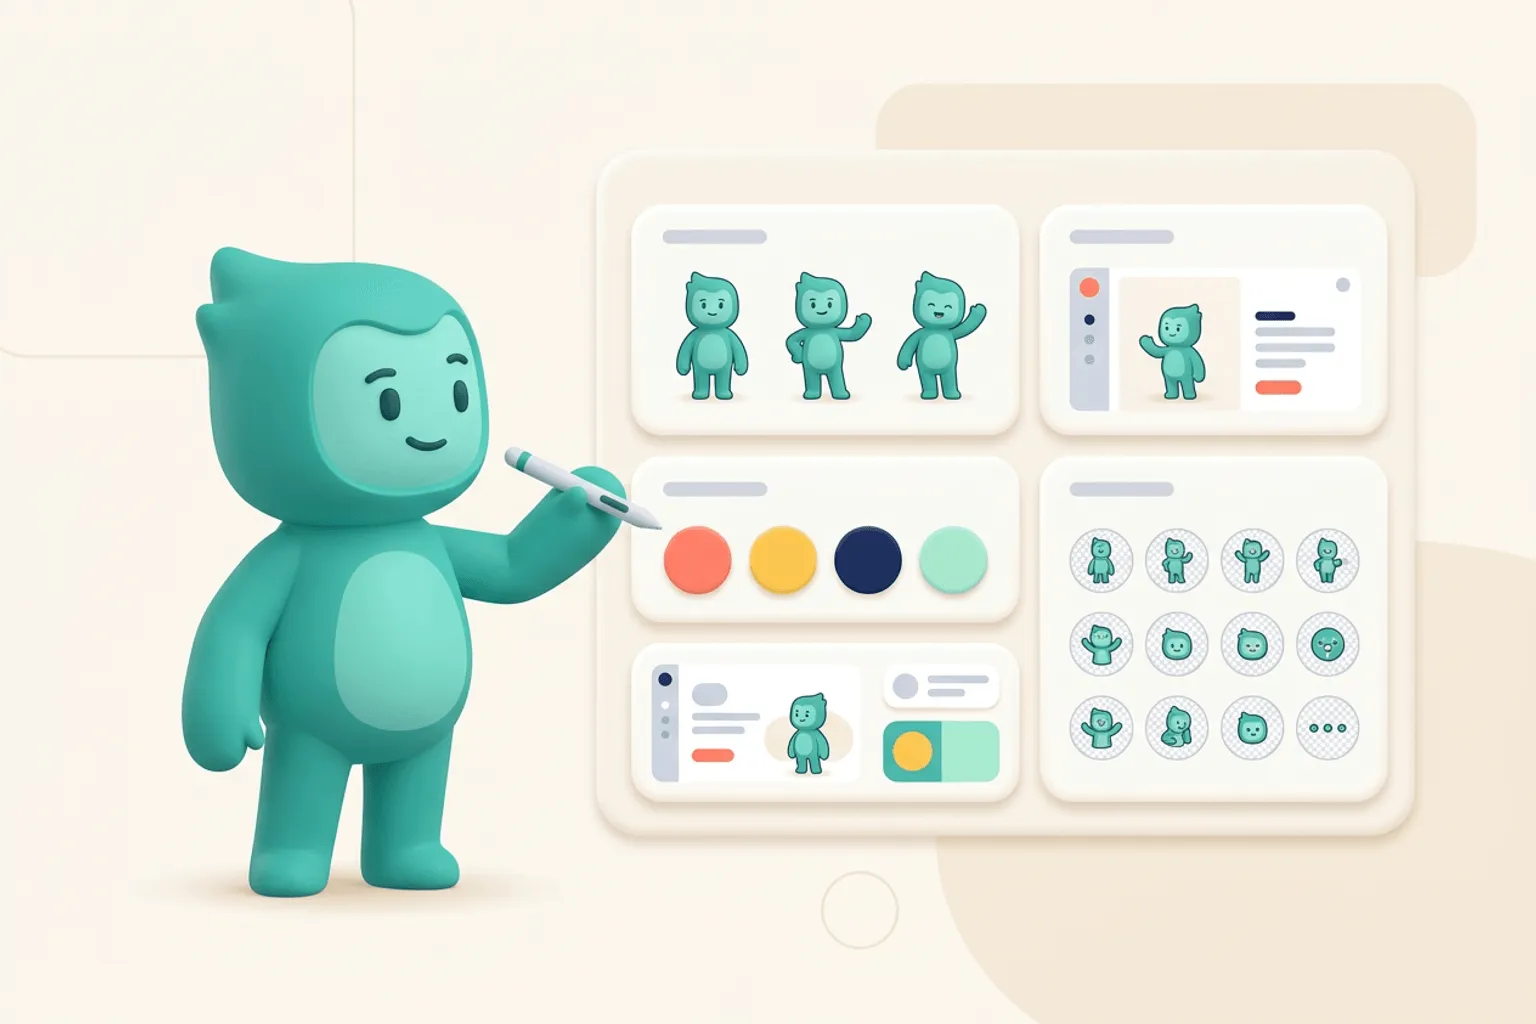
Step 3: generate the pose library
Once the base character works, create the poses your product actually needs. Start with welcome, pointing, thinking, celebrating, error recovery, and support. Then add category-specific scenes: coding, designing, shipping, analyzing, inviting, or presenting.
Test each pose in context. A pose that looks charming in isolation may be too large, too detailed, or too emotionally intense for a real interface.
Implementation Checklist
Use this checklist before publishing the mascot assets. It keeps the character useful across the product instead of turning it into a one-page illustration.
- Write a one-paragraph mascot brief.
- Generate and refine one base character first.
- Create six core product poses.
- Export and test assets in actual screens.
Copy This Prompt
Use this as a starting point in svgapp, then add your brand colors, product category, audience, and any reference image that should guide the character.
Create an SVG mascot for a collaborative app. Friendly, modern, simple shapes, limited palette, transparent background, and poses for welcome, guidance, thinking, success, and error recovery.Create your first mascot pack
Start with one character, then generate the poses your app needs for onboarding, empty states, and launch content.
Create Your Mascot