AI Mascot Design: How to Create a Consistent Character
Learn how to design an AI mascot that stays consistent across poses, expressions, product screens, and marketing. Includes prompts, examples, and a practical workflow.
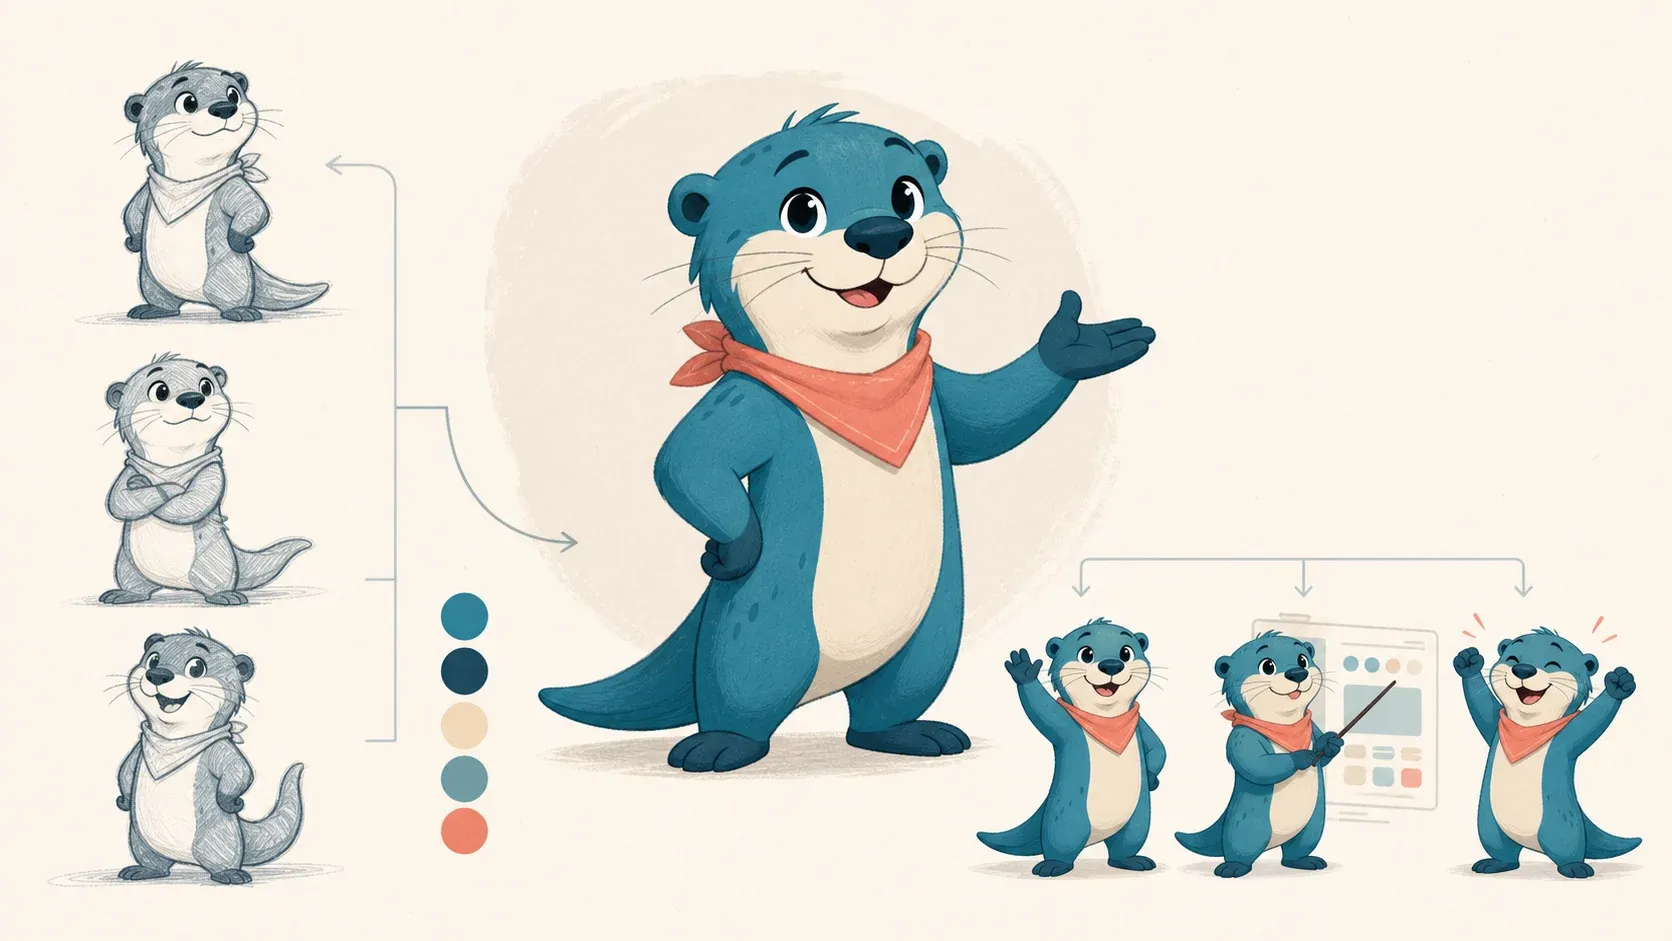
AI mascot design is not about generating one cute character. It is about creating a repeatable character system: one recognizable mascot, clear visual rules, and enough poses and expressions to support real product and marketing moments.
A practical AI mascot workflow looks like this:
- Decide what job the mascot will do.
- Write a short character brief.
- Explore a few controlled visual directions.
- Select one anchor design and lock its identity.
- Turn that identity into a character bible and model sheet.
- Generate poses one at a time, refining against the anchor.
- Test every asset in the screen or campaign where it will be used.
This guide walks through each step with reusable prompts, a filled example, consistency checks, and a starter pose plan. The goal is not just a good first image. It is a mascot your team can keep using without redesigning it every week.
What Is AI Mascot Design?
AI mascot design uses generative image tools to explore, refine, and extend a brand character. The AI can help create concept variations, edit specific features, produce expressions, and generate new poses. You still need to make the art-direction decisions: what the character represents, which features define it, and what counts as an acceptable match.
The difference between a one-off AI character and a usable mascot system is consistency.
A consistent mascot keeps the same:
- silhouette and body proportions
- face shape, eyes, ears, and markings
- color palette and rendering style
- signature clothing, accessories, or props
- personality and range of expression
The pose can change. The identity should not.
That distinction matters because mascots rarely live in one place. The same character might welcome a user during onboarding, point toward an empty-state action, soften an error message, celebrate a completed task, and introduce a feature launch. If every asset looks like a different cousin, the character cannot become a reliable part of the brand.
Step 1: Define the Mascot’s Job Before Its Appearance
Starting with species, colors, or an image prompt is tempting. Start with usage instead.
List the places where the mascot will appear during its first three months. For each placement, write the user’s situation and what the character should communicate.
| Placement | User situation | Mascot’s job | Useful pose |
|---|---|---|---|
| Homepage hero | Evaluating the product | Make the product feel approachable | Presenting or inviting |
| Onboarding | Completing a first task | Guide without distracting | Pointing or explaining |
| Empty state | No projects yet | Suggest a clear next action | Holding a starter item |
| Error state | Something failed | Acknowledge the interruption | Concerned or repairing |
| Success state | A task is complete | Reinforce progress | Celebrating |
| Feature launch | Learning what changed | Direct attention to the feature | Announcing or demonstrating |
This exercise prevents a common failure: designing a visually interesting mascot that has no useful role after the homepage.
Choose a role, not just a personality
“Friendly” is too vague to guide a design. A role makes the personality actionable.
- Guide: explains steps and points users forward
- Coach: encourages progress and celebrates milestones
- Expert: clarifies complex or technical information
- Host: welcomes people and introduces new content
- Sidekick: reacts alongside the user with humor or empathy
A security product might choose a calm guide rather than a playful trickster. A creative tool might benefit from an energetic sidekick. The role should fit both the brand promise and the moments you listed.
Step 2: Write a One-Page AI Mascot Brief
The brief turns brand strategy into visual constraints. Keep it short enough to reuse while prompting, but specific enough that another person could judge whether an image is on-brand.
Use this template:
Brand:
Audience:
Product promise:

Mascot role:
Three personality traits:
One trait to avoid:

Character type or species:
Body shape and proportions:
Face and eye style:
Primary colors:
Signature detail:
Rendering style:

First five placements:
Required expressions:
Must never change:
Filled example: a SaaS project-management mascot
Here is the brief behind the otter used throughout this article:
Brand: a calm project-management app for small teams
Audience: founders, designers, and product teams
Product promise: make complex work feel clear and manageable

Mascot role: helpful project guide
Personality: resourceful, optimistic, composed
Avoid: frantic or childish

Character: upright river otter
Proportions: compact body, rounded head, short legs, broad tail
Face: cream muzzle, large dark eyes, small rounded ears
Colors: teal-blue fur, navy details, cream belly, coral scarf
Signature detail: simple coral neckerchief
Style: clean editorial illustration with light texture

First placements: homepage, onboarding, empty state, error, success
Expressions: welcoming, curious, concerned, focused, delighted
Never change: face shape, cream markings, scarf, body proportions, palette
Notice what the brief leaves open. It does not specify every paw position or facial angle. It protects the identity while allowing the character to act.
If you are still deciding between a mascot and a broader spokesperson, read the brand mascot vs. brand character comparison. If the character direction is already clear, continue to concept exploration.
Step 3: Explore Three Controlled Concepts
Concept exploration should answer meaningful design questions, not produce a wall of random animals.
Create three directions that share the same role and personality but vary one major dimension:
- Shape direction: round and reassuring
- Shape direction: compact and energetic
- Shape direction: tall and composed
Or keep the proportions stable and compare one other variable, such as clothing, level of detail, or rendering style.
A prompt for useful concept exploration
Create a character concept sheet for a brand mascot.

Brand role: helpful project guide
Personality: resourceful, optimistic, composed
Character: upright river otter
Signature detail: simple coral neckerchief
Palette: teal-blue, navy, cream, coral
Style: clean editorial illustration with subtle paper texture

Show three full-body concept directions side by side:
1. round and reassuring
2. compact and energetic
3. slightly taller and composed

Keep the species, palette, scarf, and overall art style consistent.
Use neutral standing poses on a plain background.
Do not include text, logos, scenes, or extra characters.
Generate neutral views first. Dynamic poses can hide weak proportions and make comparisons harder.
How to choose the strongest concept
Score each direction from 1–5 on these questions:
- Can you recognize the silhouette at thumbnail size?
- Does the expression match the brand’s tone?
- Are the signature features easy to reproduce?
- Can the body support pointing, holding, sitting, and celebrating poses?
- Will the design still work without a detailed background?
- Does it look distinct from familiar mascots in the same category?
Choose the concept that works as a system, not necessarily the most detailed image.
Step 4: Lock an Anchor Character
Your anchor is the approved full-body reference against which every future image will be judged. Do not start building a pose library until this image is stable.
Use a neutral or lightly expressive three-quarter pose on a plain background. Make sure you can clearly inspect:
- head-to-body ratio
- eye shape and spacing
- muzzle, nose, and mouth construction
- ear size and position
- hands or paws
- leg length and stance
- tail shape
- palette and markings
- accessory placement
Then refine one variable at a time.
Revise the mascot while preserving its pose, face, body proportions,
palette, cream markings, and coral scarf.

Only change the tail: make it slightly broader at the base and taper it
more smoothly toward the tip.

Do not change the expression, clothing, colors, or rendering style.
This is more reliable than asking for a broad improvement such as “make it look more professional,” which gives the model permission to reinterpret the whole character.
Anchor approval checklist
Before approving the anchor, test it in three ways:
- Silhouette test: fill it with one color. Is it still identifiable?
- Small-size test: reduce it to the size it will appear in an empty state. Is the face still readable?
- Grayscale test: remove the color. Do the major shapes still separate clearly?
If the design only works at poster size, simplify it before creating more assets.
Turn one strong concept into a consistent mascot
Create an anchor character, refine the details, and preserve the same identity as you build new poses.
Create Your AI MascotStep 5: Build a Character Bible and Model Sheet
An image is a reference. A character bible explains why the reference looks the way it does.
Your bible does not need to be a large brand manual. A useful first version can fit on one page and contain four sections.
Identity rules
- short written character description
- front, three-quarter, side, and back views
- height and proportion relationships
- silhouette-defining features
- exact markings and accessory placement
Style rules
- line weight or edge treatment
- flat, cel, textured, or dimensional shading
- allowed palette
- background and shadow rules
- acceptable level of detail
Expression rules
- default neutral expression
- normal eye and mouth construction
- how far expressions can exaggerate
- emotions that fit the character
- emotions or gestures that feel off-brand
Production rules
- minimum display size
- preferred crops
- transparent-background requirements
- export formats
- file-naming convention
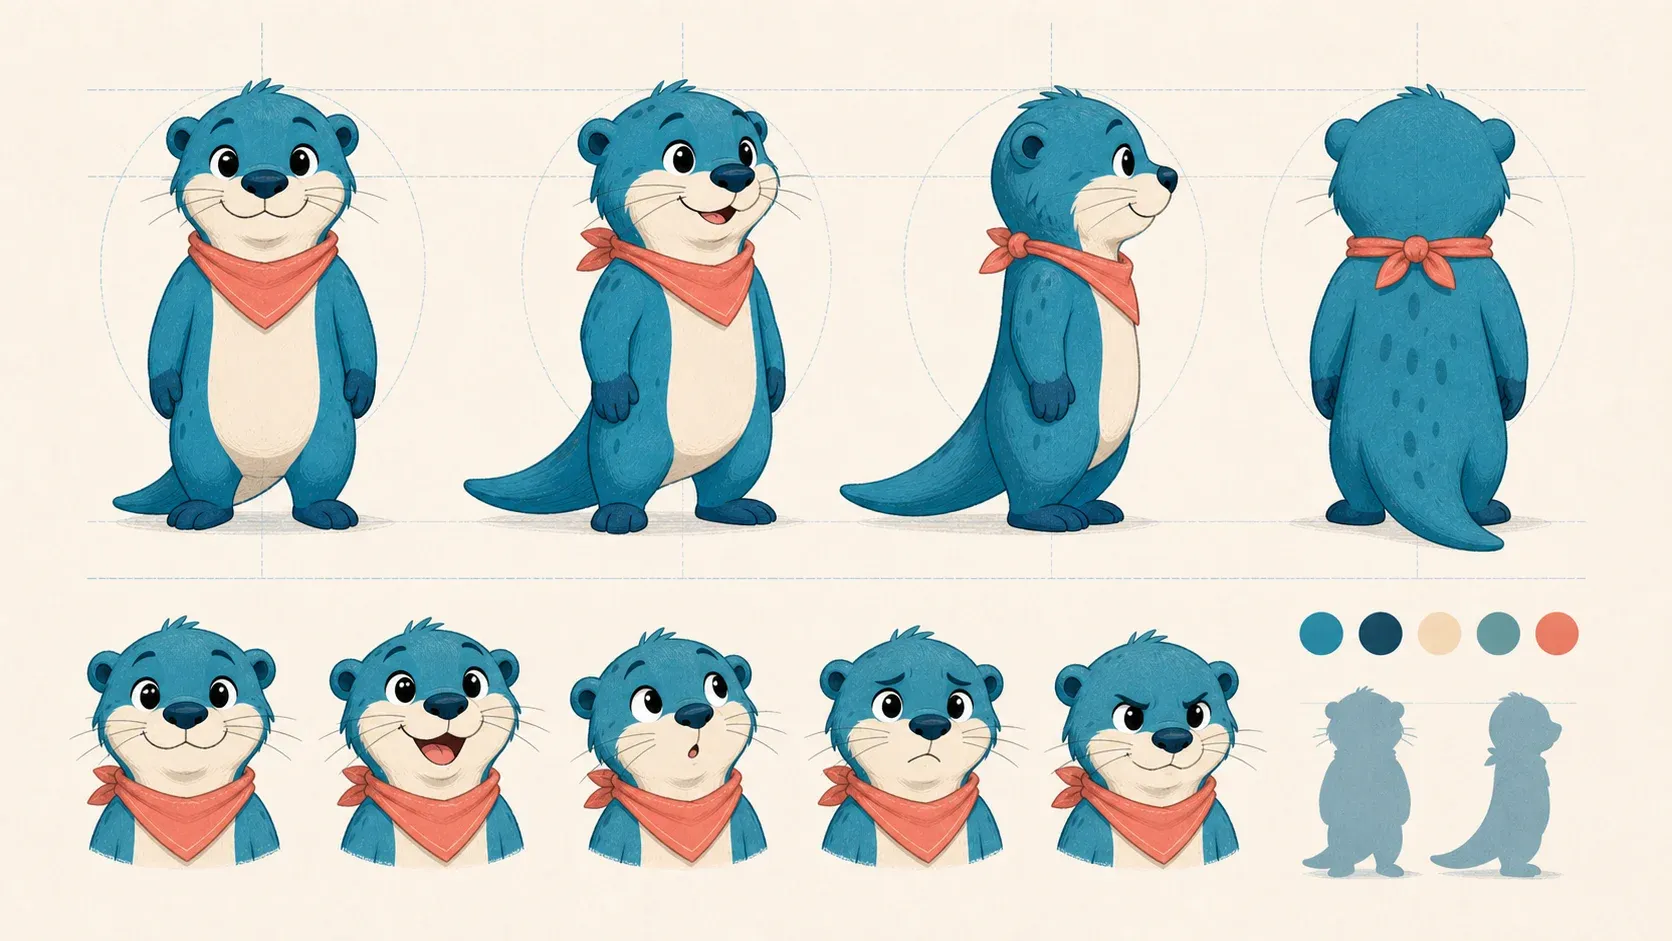
A compact model sheet makes proportions, markings, expressions, and palette easier to compare across future generations.
The point of a model sheet is not to force every image into the same stance. It gives the team enough information to change the action without changing the character.
Step 6: Use a Prompt System, Not a New Prompt Every Time
For each new asset, assemble the prompt from stable and variable blocks.
Block 1: identity — never changes
The same upright river otter mascot: compact body, rounded teal-blue head,
small rounded ears, large dark eyes, cream muzzle and belly, broad tapered
tail, and a simple coral neckerchief. Resourceful, optimistic, composed.
Block 2: style — rarely changes
Clean editorial illustration, fine navy outlines, restrained flat colors,
gentle paper texture, minimal dimensional shading, readable at small sizes.
Block 3: action — changes for each asset
The mascot stands beside an empty project card, holding a small clipboard
and pointing toward the primary action area with an open, encouraging pose.
Block 4: production constraints — changes by placement
Full body, centered composition, transparent background, generous space
around the silhouette. No text, logos, extra characters, or detailed UI.
Combine the blocks, attach the anchor image, and generate one pose at a time. The same structure works with most image tools even when their exact reference-image controls differ.
For more prompt patterns, see the mascot prompt guide.
Worked prompt: an onboarding guide pose
Create a new pose of the mascot in the attached anchor reference.

IDENTITY TO PRESERVE
The same upright river otter mascot: compact body, rounded teal-blue head,
small rounded ears, large dark eyes, cream muzzle and belly, broad tapered
tail, and a simple coral neckerchief. Keep the exact face shape, markings,
body proportions, scarf, and palette.

STYLE TO PRESERVE
Clean editorial illustration, fine navy outlines, restrained flat colors,
gentle paper texture, and minimal dimensional shading.

NEW POSE
The mascot is guiding a new user through the first setup step. It holds a
small checklist in its left paw and points gently to the right with its
other paw. The expression is attentive and encouraging, not overexcited.

OUTPUT
Full body, transparent background, clear silhouette, no text, no logos,
no extra characters, no detailed interface, no change to the mascot design.
The identity block may feel repetitive. That repetition is useful: it makes the non-negotiable details explicit every time.
Step 7: Generate and Refine One Pose at a Time
Large pose sheets look efficient, but they make corrections difficult. Generate a single pose, compare it with the anchor, fix the drift, and only then move to the next pose.
Use this review loop:
- Place the new pose beside the anchor at the same height.
- Check identity before judging style or composition.
- List the two most important mismatches.
- Ask for a targeted edit that preserves everything else.
- Save the approved pose as an additional reference.
Example correction prompt
Revise this pose to match the anchor character more closely.

Keep the current pointing action and expression.
Correct only these differences:
1. restore the shorter, rounder muzzle from the anchor
2. return the scarf to the same coral color and triangular shape

Preserve the teal-blue fur, cream markings, body proportions, tail,
illustration style, transparent background, and composition.
Correcting one or two issues per pass gives you a clear way to tell whether the edit worked.
Step 8: Build a Pose Library Around Real Product Moments
Do not begin with “100 mascot poses.” Begin with the smallest set that covers your most important placements.
A practical ten-pose starter library
| Pose | Emotion | Best used for |
|---|---|---|
| Welcome | Warm, open | Homepage, first login |
| Pointing | Focused | Onboarding, feature callouts |
| Explaining | Helpful | Tutorials, documentation |
| Thinking | Curious | Loading, analysis, prompts |
| Empty-state helper | Encouraging | First-project screens |
| Searching | Attentive | No results, discovery |
| Concerned | Calm empathy | Errors, interruptions |
| Repairing | Determined | Maintenance, retry states |
| Celebrating | Delighted | Task completion, milestones |
| Announcing | Confident | Launches, release notes |
Add poses when a real placement requires them. That keeps the library maintainable and makes every asset easier to evaluate.
Example: One Mascot Across Three Product Moments
The svgapp otter below changes action and emotion while keeping the recognizable character system intact.
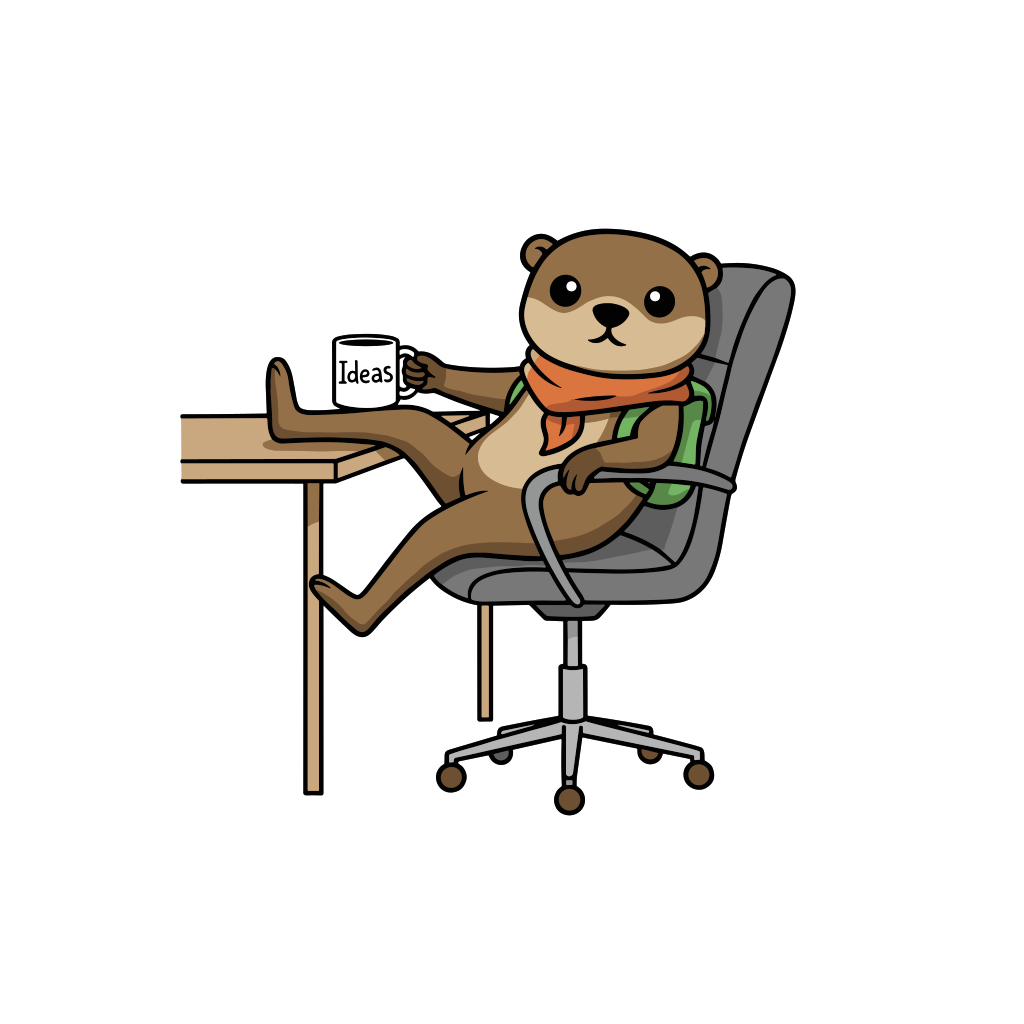
Explain a feature
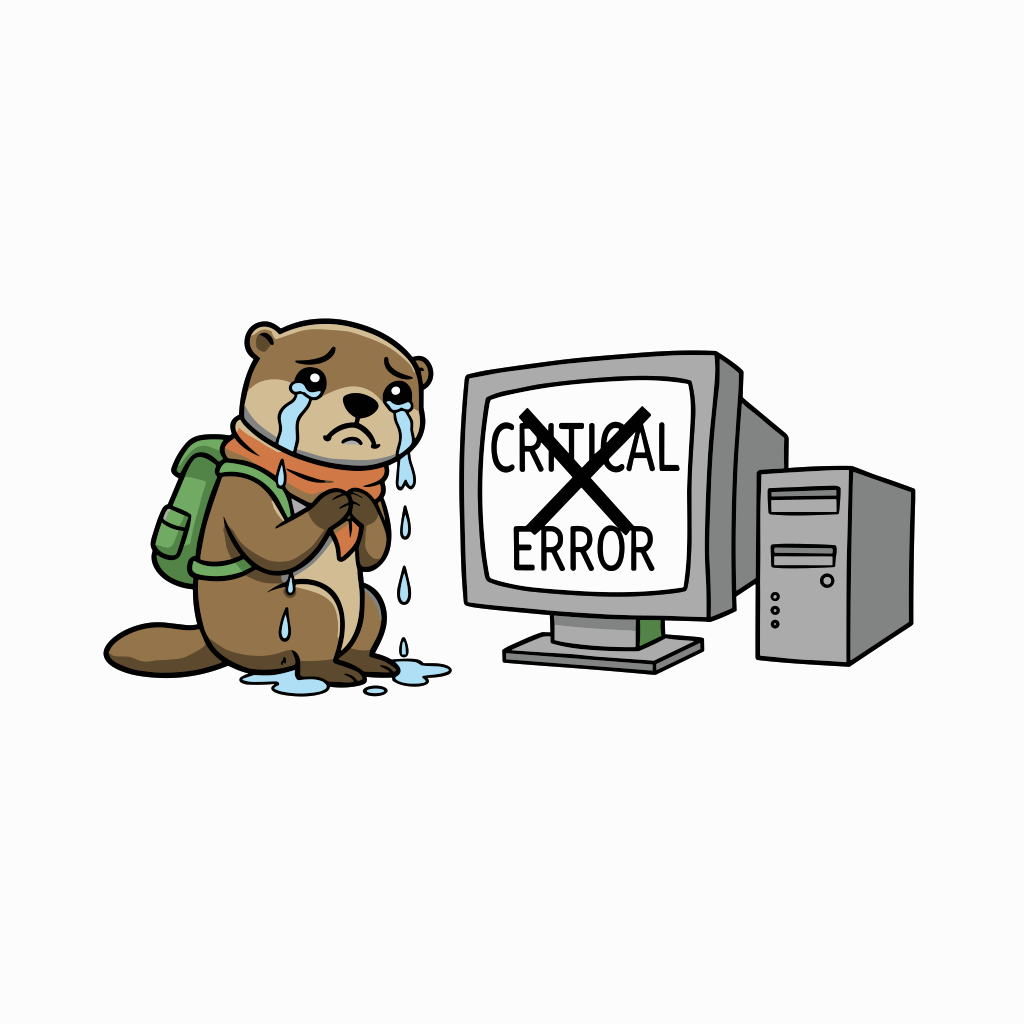
Acknowledge an error

Celebrate success
When you compare the three, look past color alone. The repeated face construction, proportions, markings, and illustration language do most of the identity work.
For a deeper pose-planning process, use the mascot poses and expressions guide.
How to Evaluate AI Mascot Consistency
“Looks similar” is not a useful approval standard. Review every pose in four passes.
1. Identity
- Is the head the same shape and relative size?
- Are the eyes, ears, muzzle, and markings constructed the same way?
- Are signature accessories present and correctly placed?
- Does the palette match the approved values?
2. Anatomy and action
- Does the pose read without the caption?
- Are limbs, paws, and props anatomically clear?
- Is the center of gravity believable?
- Is the silhouette clean at the intended display size?
3. Emotion
- Does the expression match the user’s situation?
- Is the intensity appropriate for the brand?
- Do the face and body language communicate the same emotion?
4. Production quality
- Is the background correct for the placement?
- Are edges clean enough for export?
- Does the crop leave enough room for responsive layouts?
- Does it remain readable on light and dark surfaces?
Keep a simple review grid with the anchor in the first column and new poses beside it. Differences become easier to spot when every image is the same height.
Prepare the Mascot for Product and Marketing Use
A good illustration can still fail in implementation. Before publishing an asset, prepare it for the context where it will live.
Use the right format
- SVG: best for clean vector artwork, UI illustrations, and responsive scaling
- PNG or WebP: useful for textured or raster artwork and complex shading
- Transparent background: best for flexible placement in interfaces
- Full scene: appropriate when the background is part of the story
If you need production-ready transparent assets, see the transparent SVG mascot guide.
Test the actual layout
Place the mascot in the real component before approving it. Check mobile and desktop crops, loading behavior, contrast, and whether the pose competes with the primary action.
For accessibility:
- write useful alt text when the mascot communicates information
- use empty alt text when it is purely decorative
- do not put essential instructions only inside the image
- avoid rapid or unnecessary animation around critical actions
Name files by purpose
Use names that describe where and why the asset exists:
mascot-onboarding-welcome.svg
mascot-empty-projects.svg
mascot-error-retry.svg
mascot-success-confetti.svg
mascot-launch-announcement.webp
This is easier to maintain than folders full of final-v2-new.png.
Common AI Mascot Design Mistakes
Generating too many concepts too early
More options create more comparison work. Explore a few meaningful directions, choose one, and spend the effort on refinement.
Changing several features in one revision
If you change the muzzle, outfit, proportions, and style at once, you cannot tell which change improved the design. Make focused edits.
Describing only the new pose
“Make the character celebrate” does not remind the model what must remain stable. Repeat the identity and style constraints with every generation.
Accepting identity drift because the image is attractive
A beautiful image can still be the wrong mascot. Compare it against the anchor before judging polish.
Building poses without placements
Random reactions rarely form a useful library. Tie every pose to a product state, campaign, or story.
Using the mascot as decoration everywhere
The character should support the message or interaction. If it competes with the primary action or appears in every empty corner, reduce its role.
AI Mascot Design FAQ
Can AI keep the same mascot consistent across images?
It can get much closer when you use an approved anchor image, a repeated identity description, controlled edits, and one-pose-at-a-time review. You should still expect to art-direct and correct some outputs. Consistency is a workflow, not a single prompt setting.
What should I generate first?
Generate a neutral full-body anchor on a plain background. Approve the proportions, face, markings, palette, and signature details before asking for complex actions or scenes.
How many poses does a new mascot need?
Start with the smallest set that covers real placements. For many products, six to ten poses are enough for the first release: welcome, point, explain, think, empty state, error, help, celebrate, and announce.
Should an AI mascot be a vector?
Not necessarily. Choose the format based on the visual style and where the asset will be used. Clean vector artwork is flexible for interfaces and scaling; textured raster art can work well for editorial or marketing use. What matters is having consistent source assets and appropriate exports.
Do I need a character bible if I work alone?
Yes. It gives you a stable standard when you return to the character later, and it prevents your prompts and approvals from changing with your memory or mood.
Can I use an existing character as inspiration?
You can study broad design principles such as silhouette, expression range, and model-sheet structure. Avoid copying a recognizable character’s distinctive appearance. Your mascot should come from your own brand role, visual rules, and original concept exploration.
From One AI Mascot to a Reusable Character System
The strongest AI mascot workflow is deliberately narrow: define the job, approve the identity, document the rules, and extend the character only when a real use case requires it.
That discipline produces fewer throwaway images and a more useful brand asset. Instead of prompting from scratch for every campaign, you build from one recognizable anchor and a growing library of approved poses.
Build a mascot that stays recognizable
Create your anchor character, refine the design, and generate consistent poses for product screens, content, and campaigns.
Create Your AI Mascot